
How to Create a Campaign
A campaign is a container for outreach to a group of prospects. You define who you're targeting, how Valley should write, and what product you're selling. Valley handles the rest.
Campaign Sources
You can create campaigns from three sources:
Lists
Create campaigns directly from your lists, including Warm Lists (Profile Viewers, Post Engagers, Profile Followers) as well as Valley Search Lists. Click "Create High ICP Fit Campaign" on any warm list. This is the recommended starting point.
Sales Navigator URL
Paste a LinkedIn Sales Navigator search URL to import prospects. Use a people-search URL, not a saved list.
Valley has issues with saved list URLs. If you have a saved list, unsave it and use the search URL instead. The URL should look like linkedin.com/sales/search/people?viewAllFilters=true&...
CSV Upload
Upload a CSV file with prospect data including LinkedIn profile URLs.
Maximum upload limit is roughly 3,000 prospects per import. If your Sales Navigator search returns more than that, narrow your filters.
Creating a Campaign
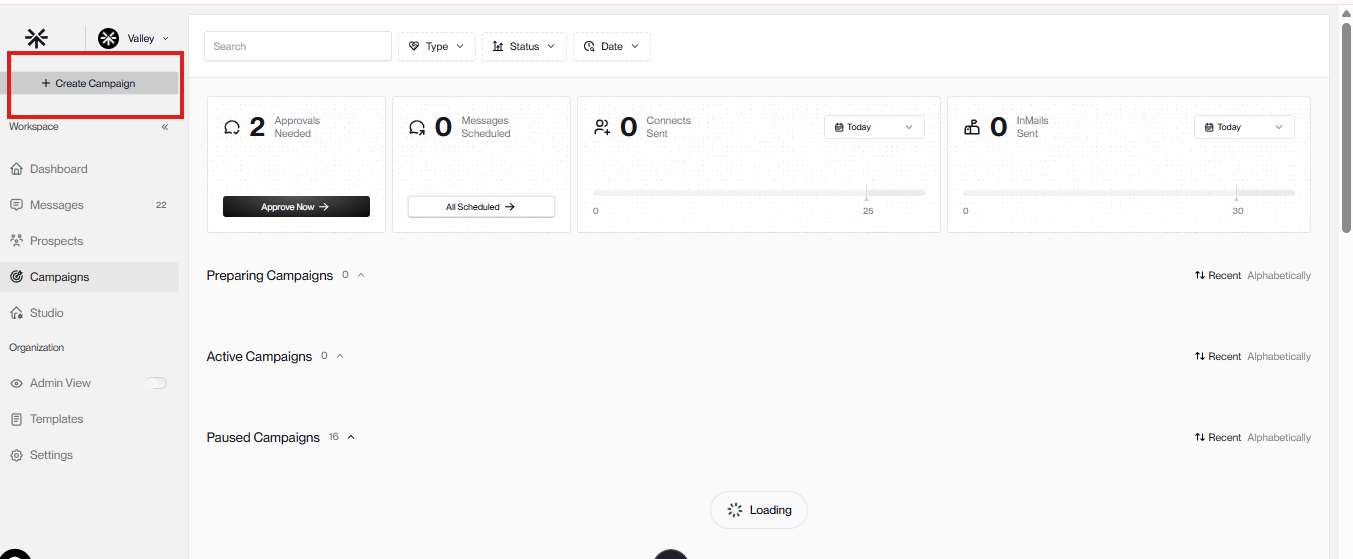
Step 1: Click "Create Campaign"
In your Valley dashboard, click the Create Campaign button.
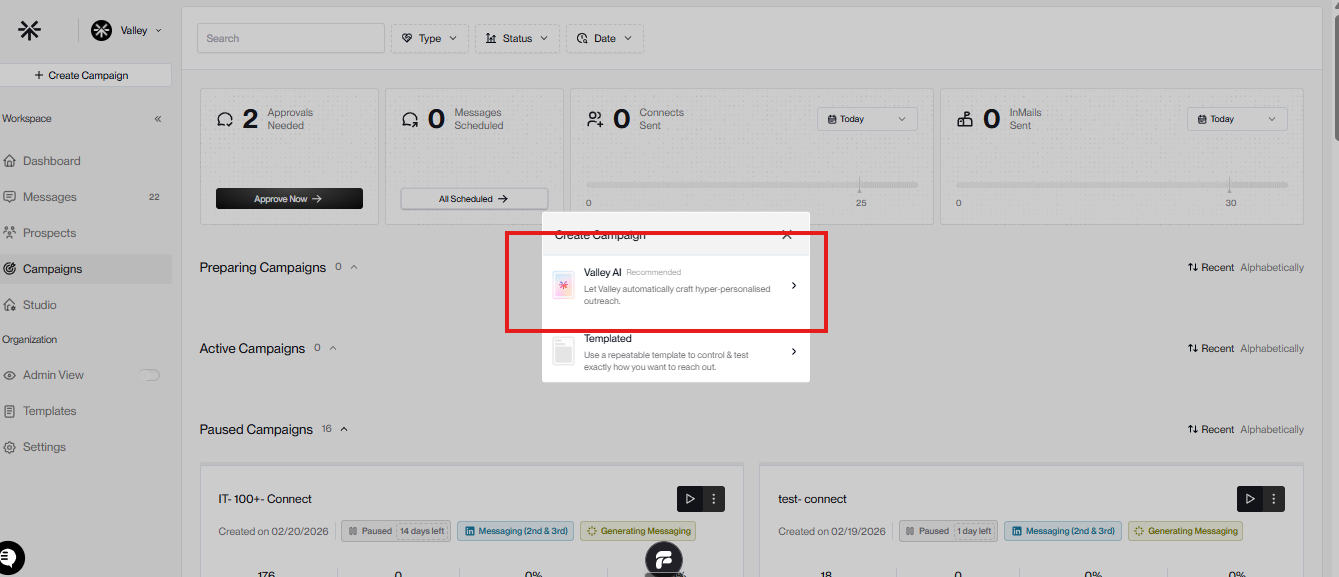
Step 2: Choose campaign type
We recommend clicking on Valley AI
Step 3: Configure Campaign Settings
Page 1: Who are you reaching out to?
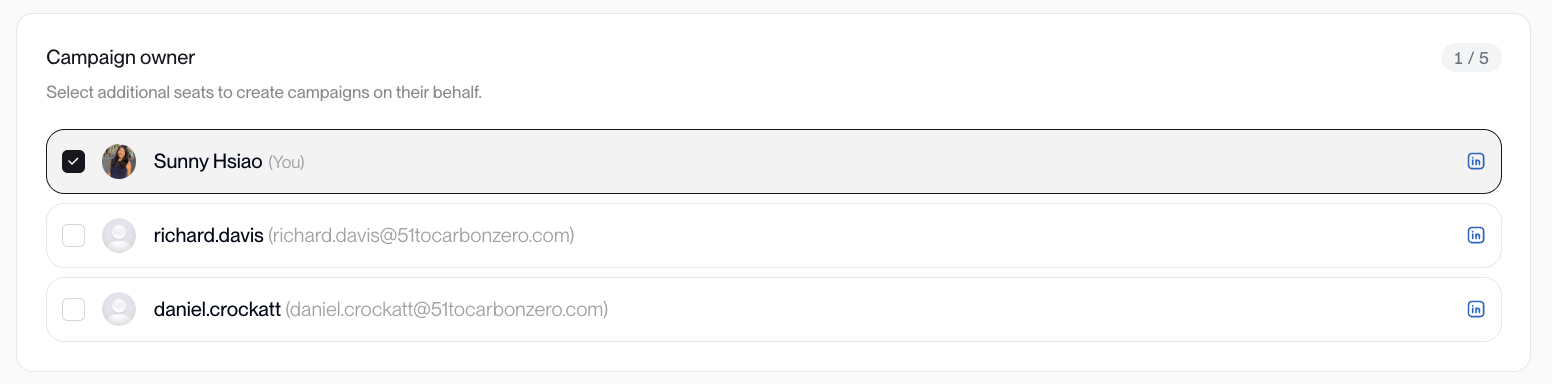
When creating campaigns from an admin seat, you can select a specific campaign owner within your Workspace.
Who do you want to reach?
- First-degree connections (people you're already connected to)
- Everyone else (people you are not connected to yet)
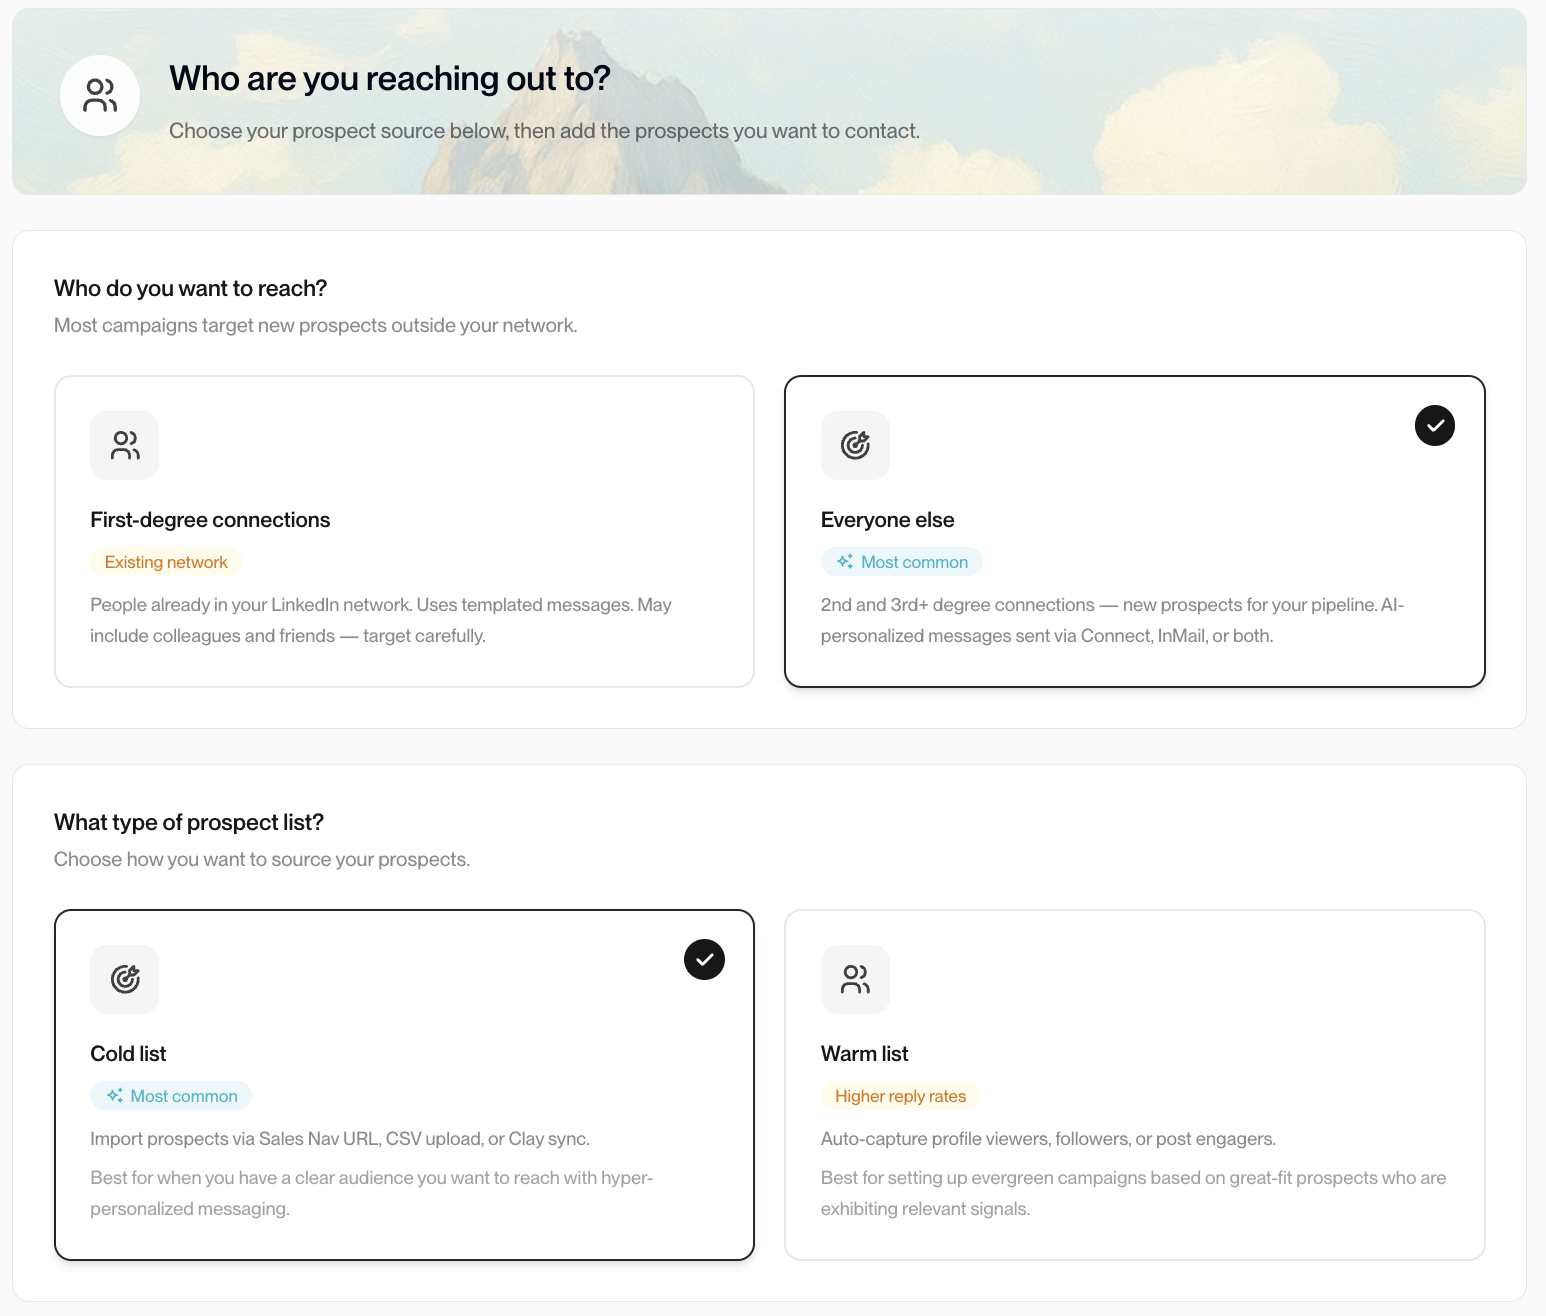
Cold list:
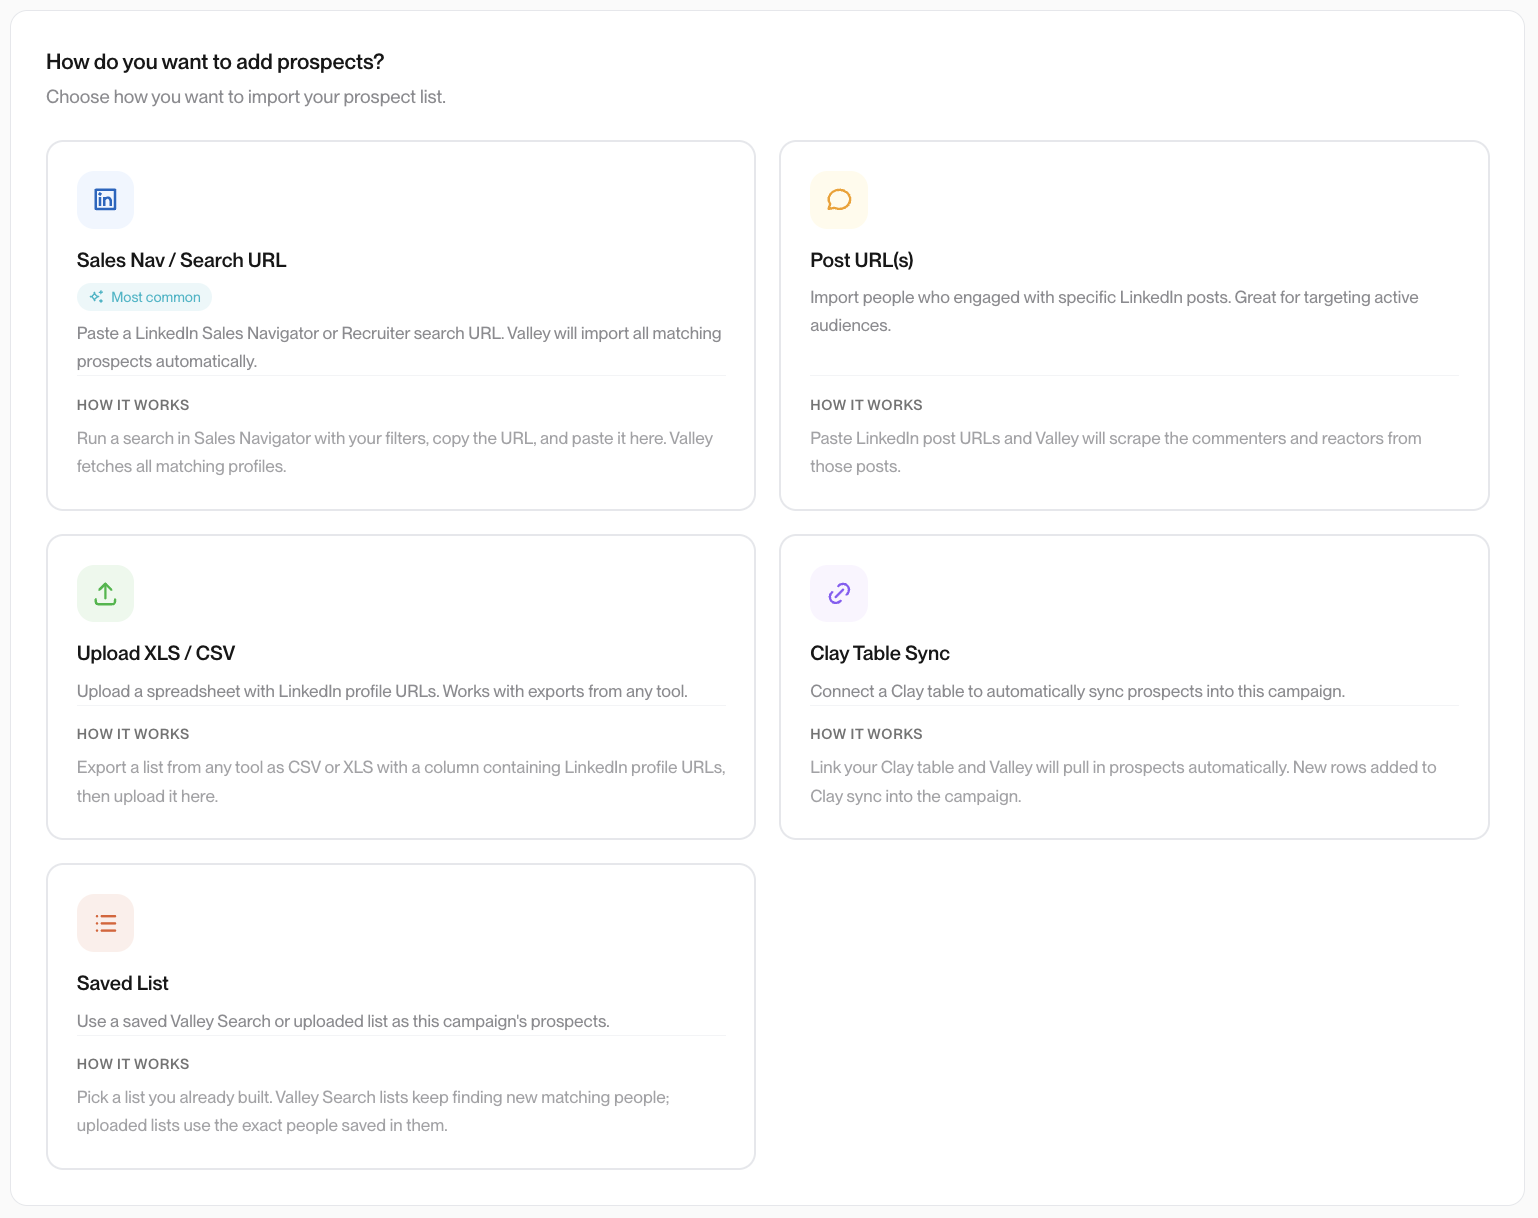
- Sales Nav / Search URL: upload prospect lists you built in Sales Nav Search
- Post URLs: upload engagers of specific LinkedIn posts as prospects
- Upload XLS upload your prospect spreadsheet (ensure a column includes LinkedIn URL)
- Clay Table Sync: sync your CRM directly from Clay
- Saved List: use of one your saved lists from 'Lists', including Valley Deep and Basic searches
Warm list (select ICP fit for campaigns / HIGH recommended):
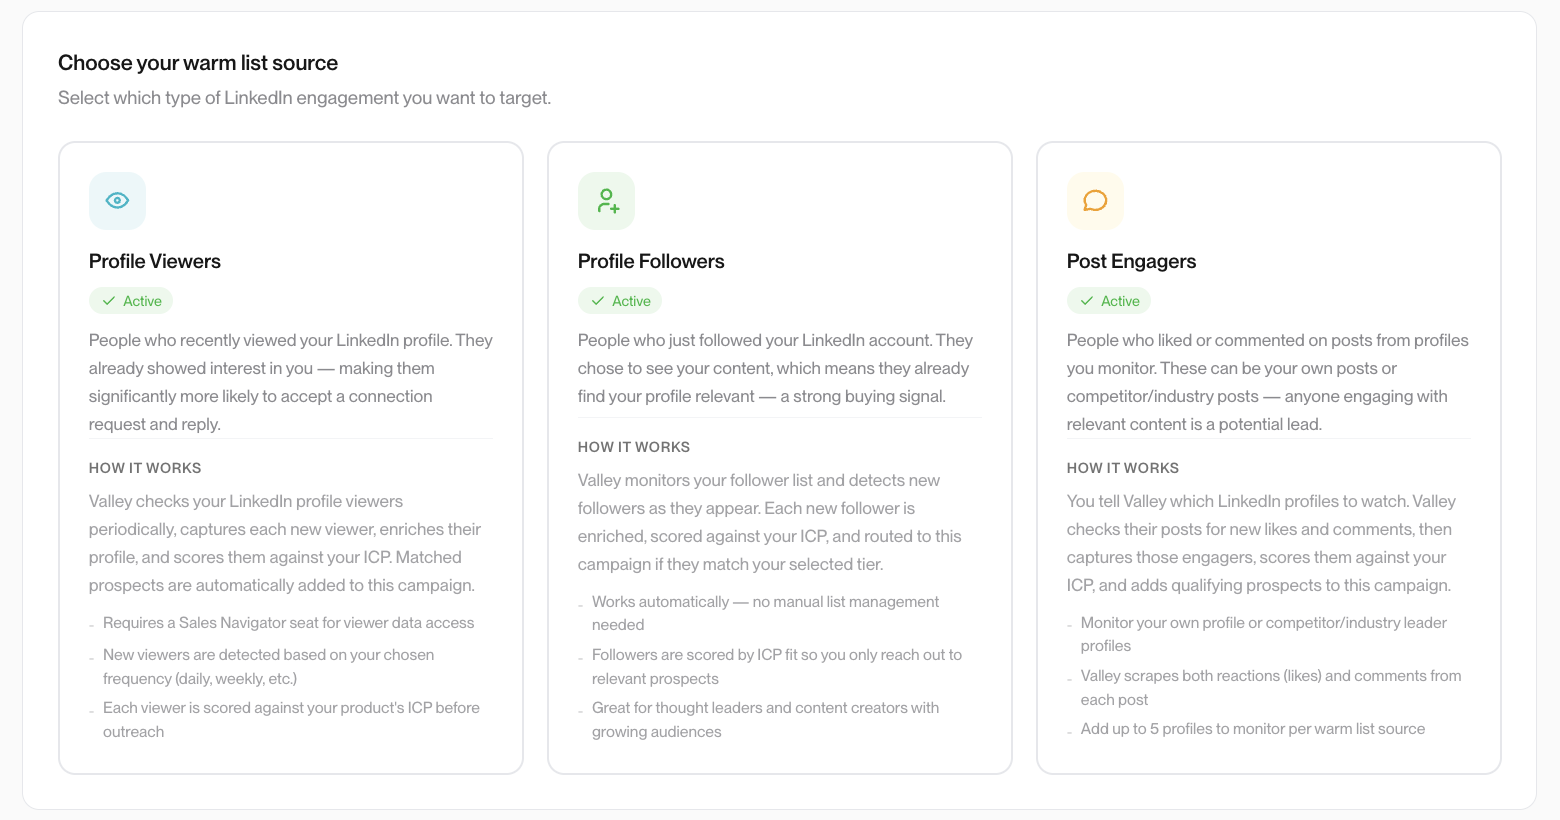
Profile viewers: everyone who views YOUR profile
Profile followers: everyone who follows YOUR profile
Post engagers: everyone who engages with the LinkedIn accounts you upload to monitor
Page 2: How should Valley reach them?
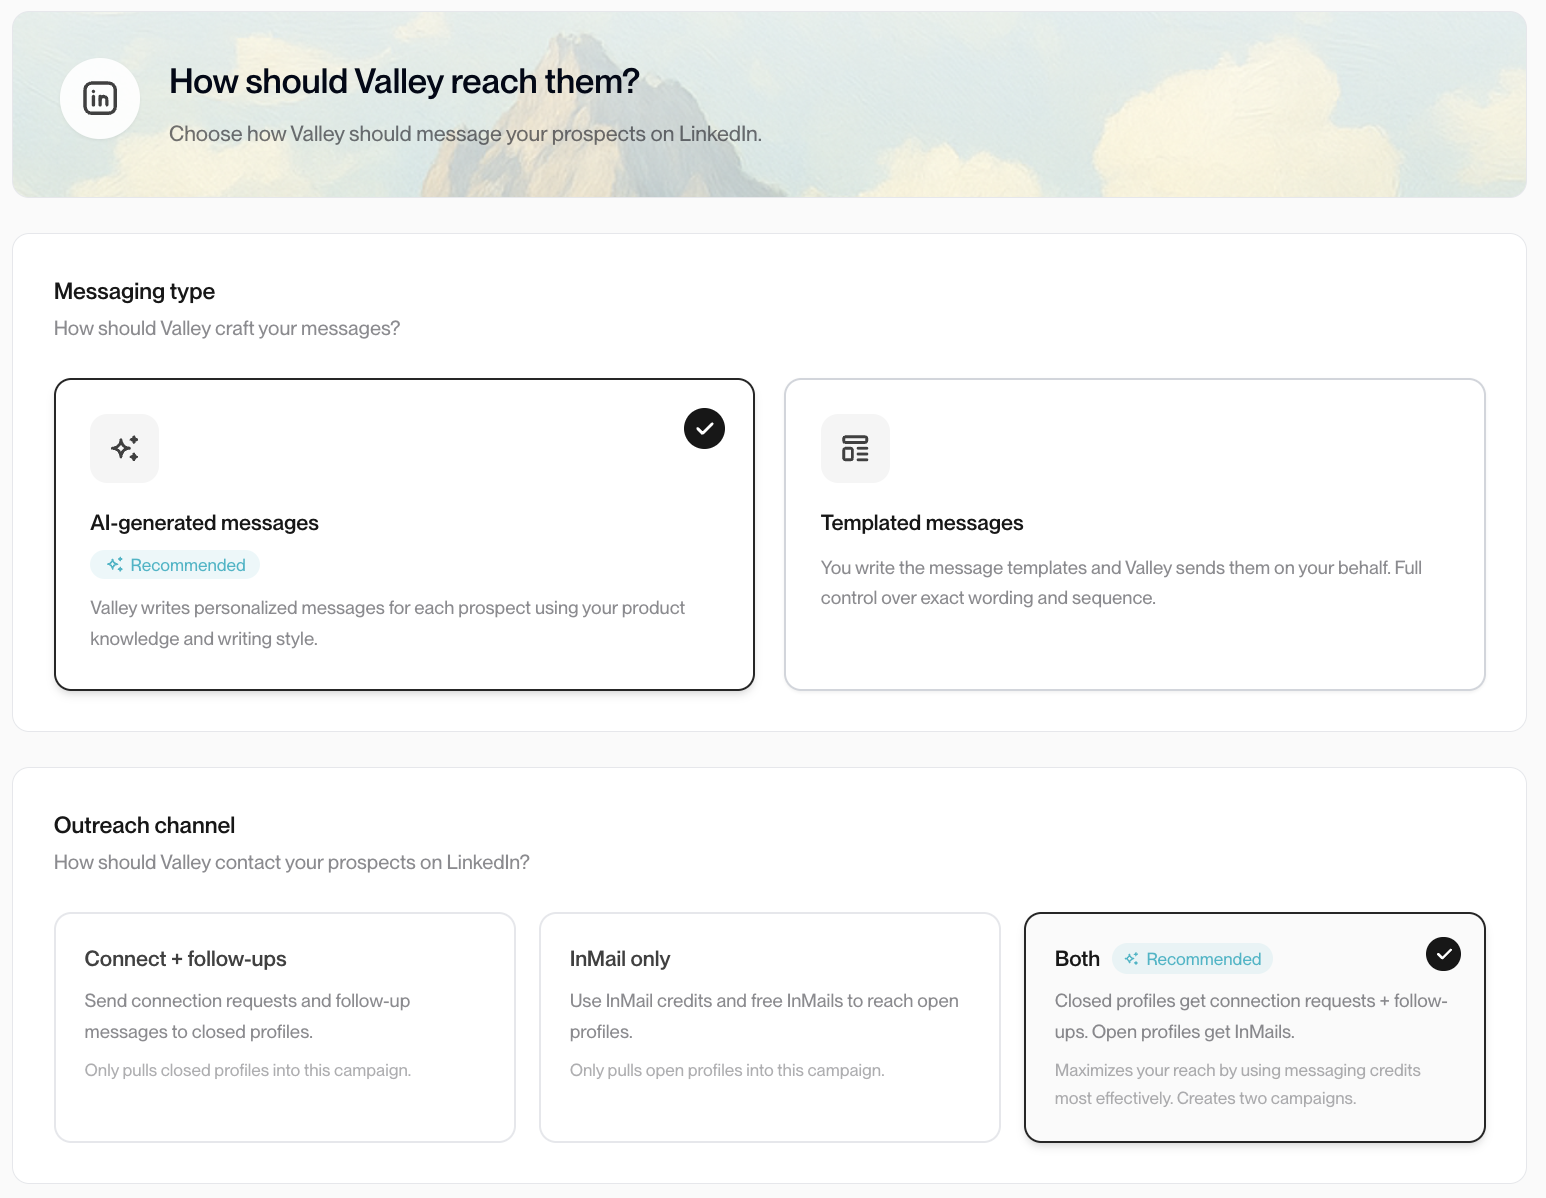
Messaging type:
- AI-generated messages: Valley uses your Writing Style from 'AI Studio'
- Templated messages: use one of your templates from the 'Templates' tab
Outreach channel:
Both will run a connect + follow-up campaign as well as an InMail campaign. Closed profiles will be routed to the connect campaign while open profiles will go into InMail.
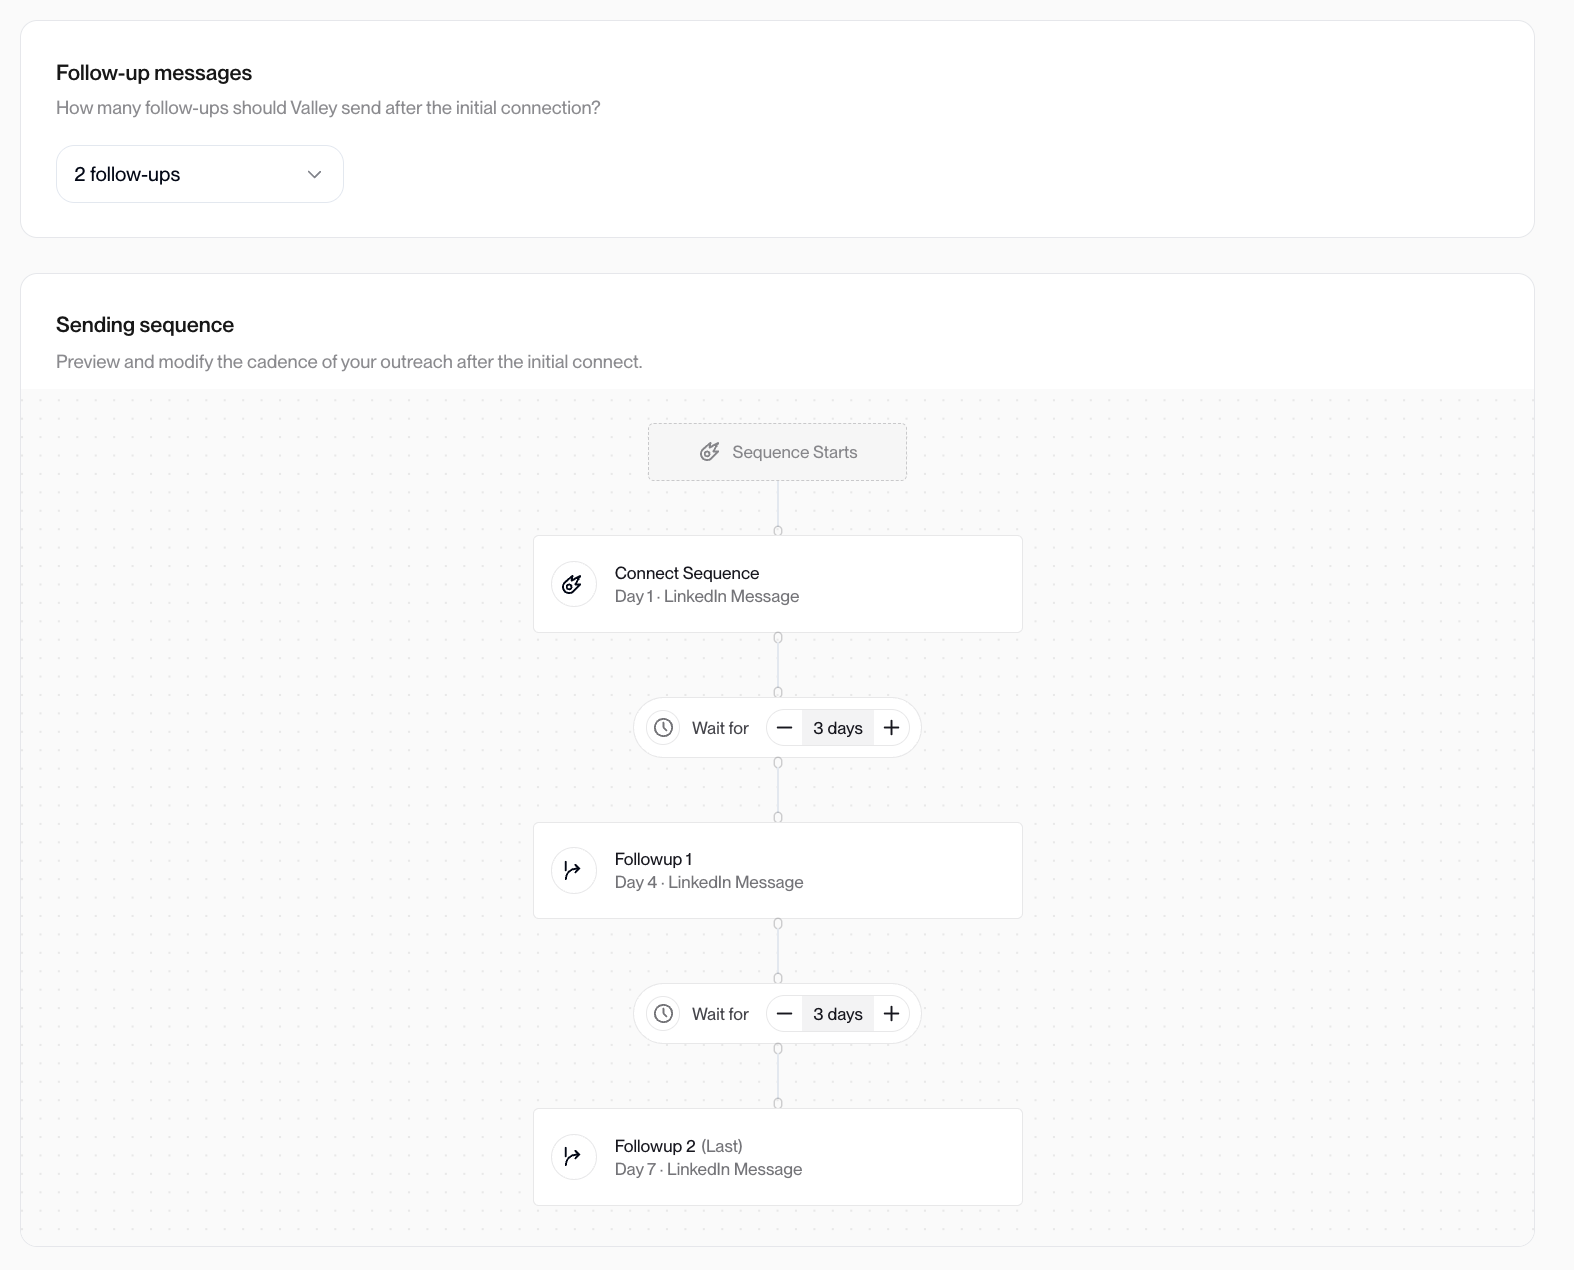
Choose the number of follow-ups for your connect campaign and update the cadence between them.
TIP: We don't recommend going beyond 3 follow-ups.
Select which product you want Valley to pitch and how you want it to write.
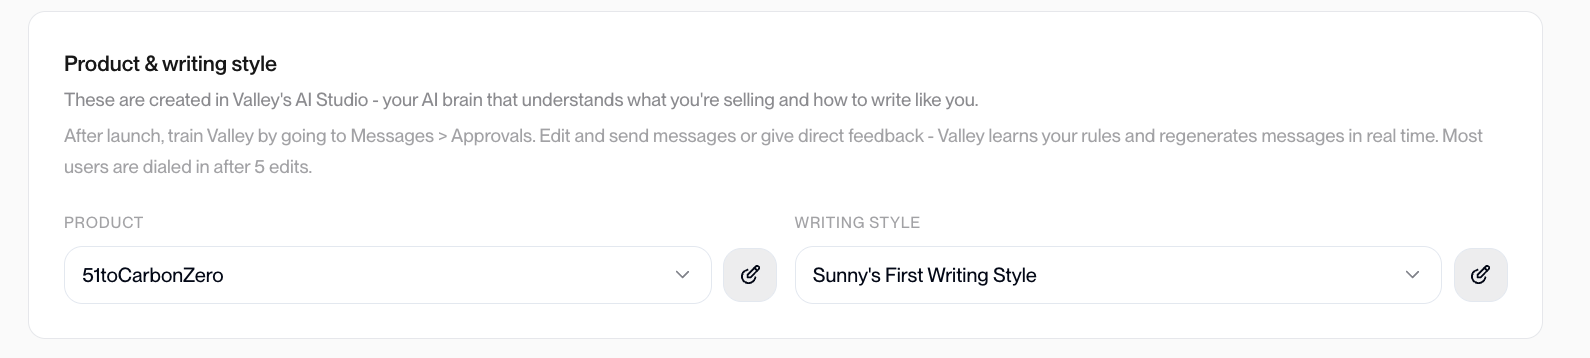
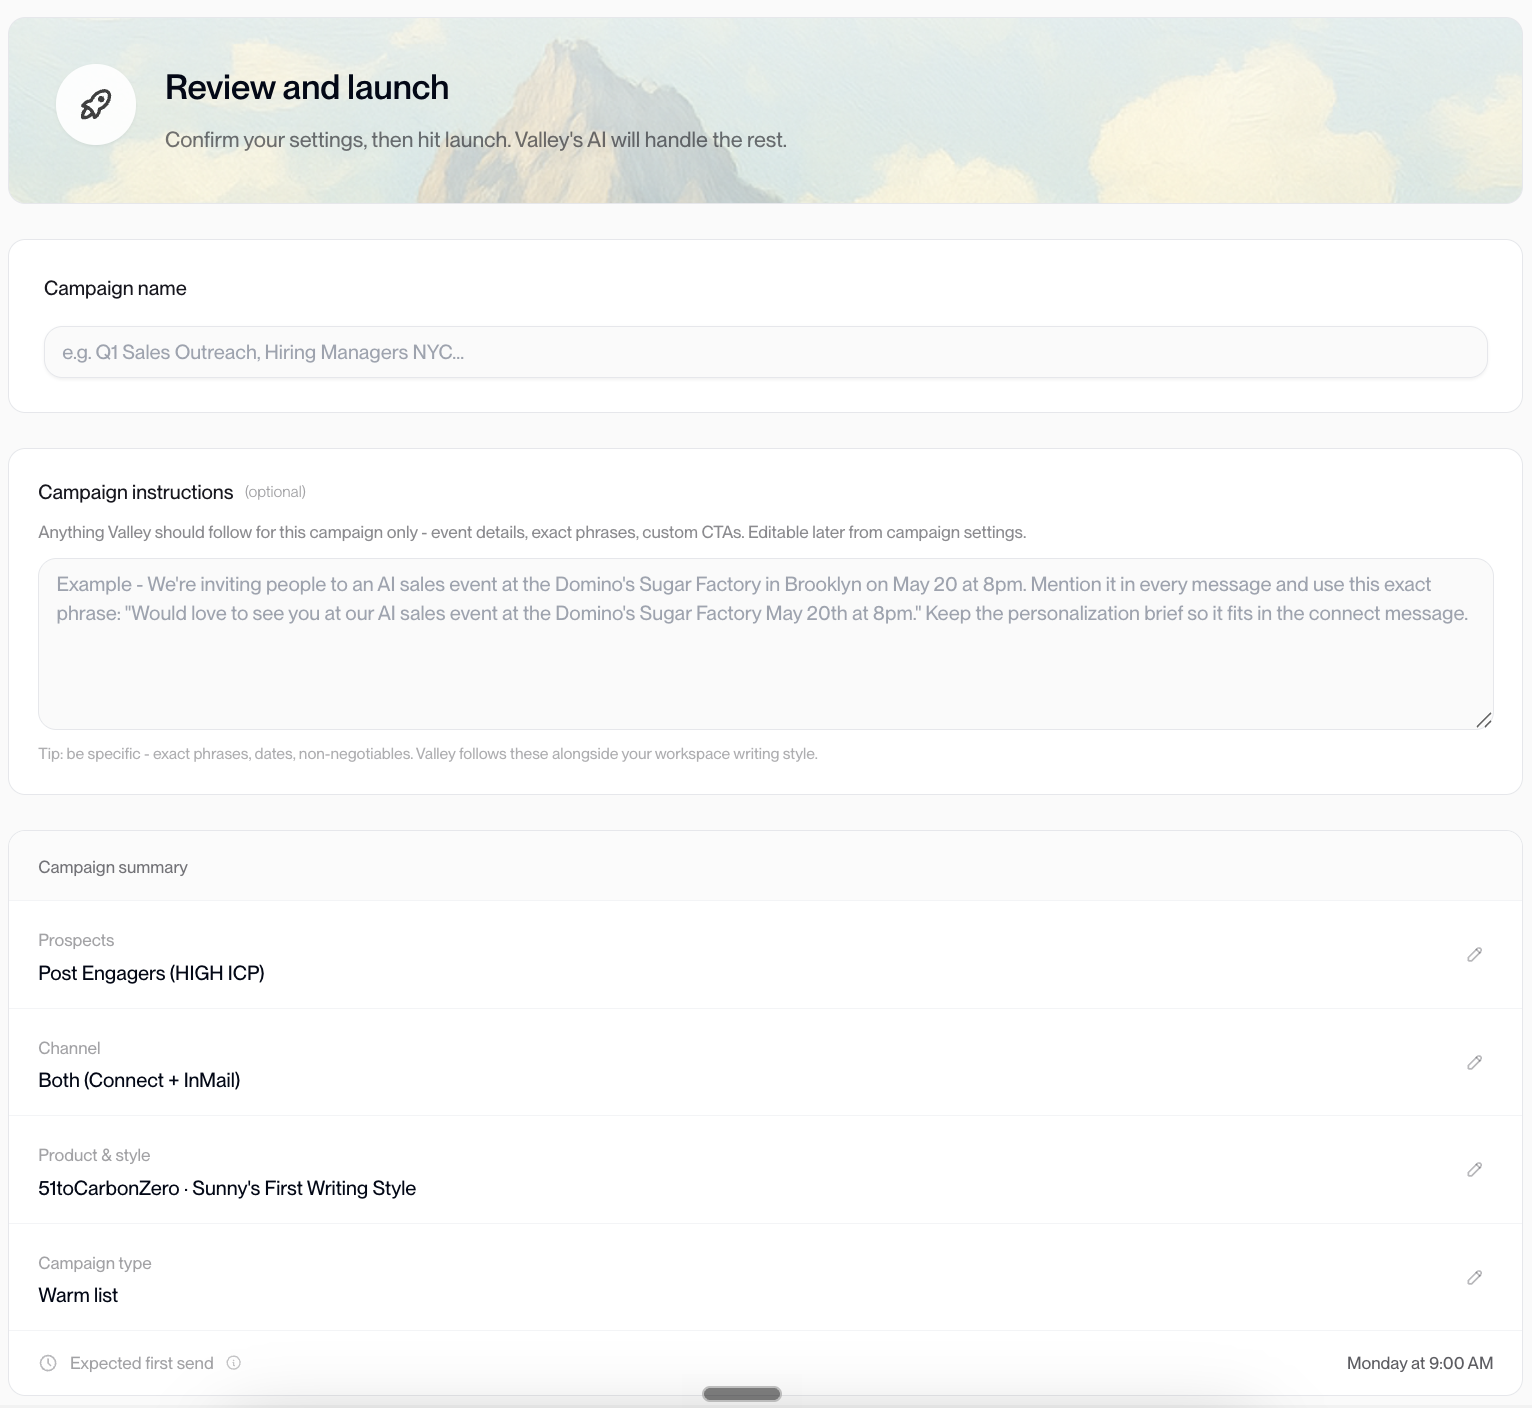
Page 3: Review and launch
Campaign name: Name your campaign
Campaign instructions: you want this campaign to do something specific? Add instructions here!
Campaign summary: make sure everything is correct!
Autopilot: With Autopilot ON, generated messages will be automatically approved and sent out. With Autopilot OFF, you will have to manually review and approve messages. Once you're happy with your messaging we 100% recommend using Valley with Autopilot ON.

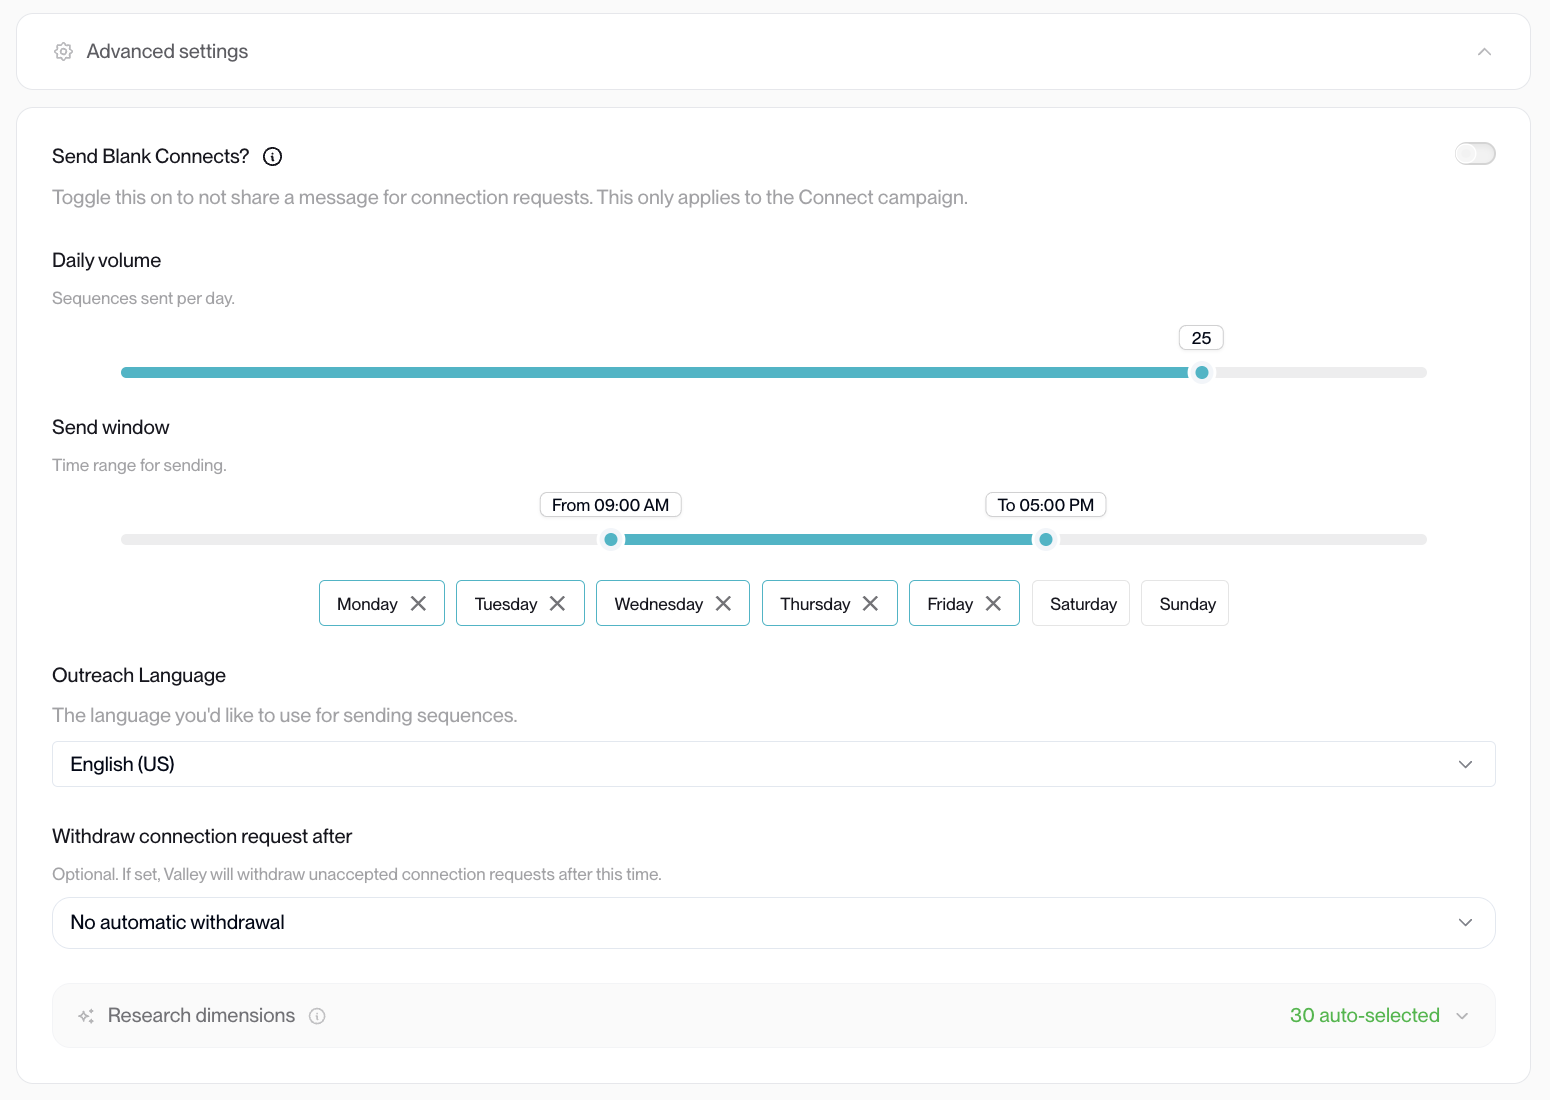
Advanced settings:
Send Blank Connects: turn this on if you want your connection requests to NOT include a message. In these cases, 'Follow-up 1' serves as the first message.
Daily volume: how many messages you want Valley to send for this campaign PER day. Note, this is a per campaign limit, not a global one, so keep this in mind when running multiple campaigns.
Send window: when do you want Valley to send messages from your account. The times are tied to your Timezone which you can find in settings.
Outreach language: what language do you want Valley to write messages in
Withdraw connection request after: should we withdraw your request if it's not accepted?
We always recommend setting the automatic withdrawal to 30 days to not burn prospects.
After Creating: Delete Low ICP Fits
For imported list campaigns, delete low-fit prospects after launching:
Open the campaign
Click the three dots menu on the campaign card
Select Delete Low ICP Fits
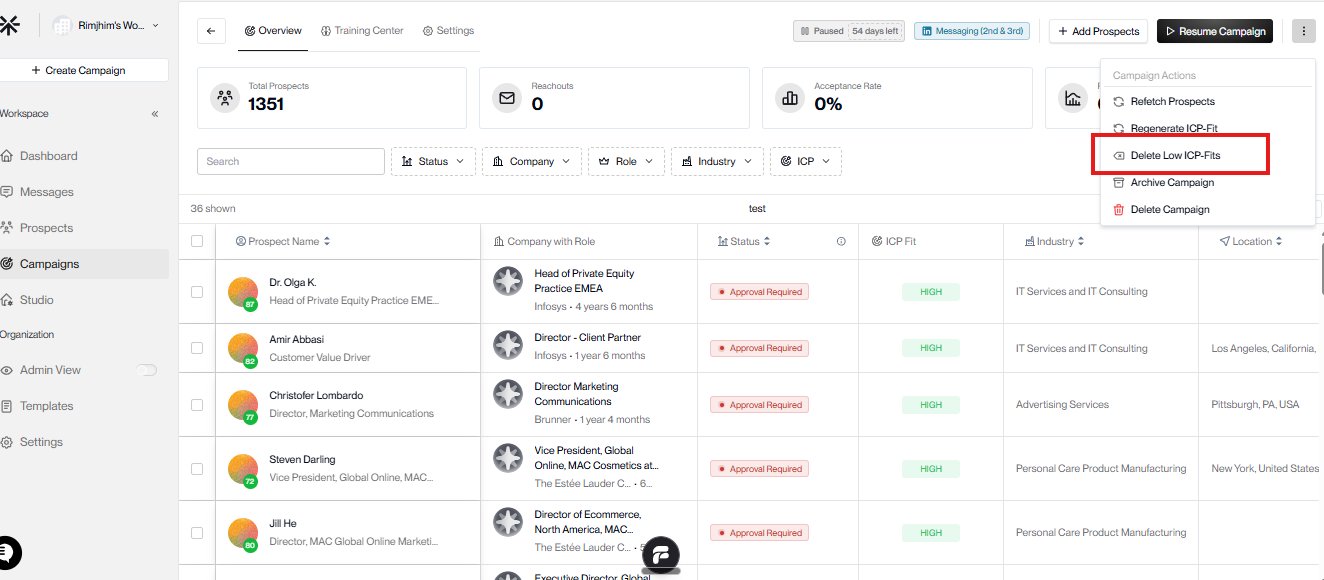
This removes prospects who do not match your ICP so you do not waste sending volume on bad-fit targets.
Delete Low ICP Fits is only available for imported list campaigns. Warm list campaigns already filter for High ICP Fit by default.
Next Steps
Review the generated messages and approve.